Tuesday, February 24, 2009

Getting the pattern for the back ready

Pattern for back of clock
Tonight I spent some time after work getting the pattern ready to cut out the back of the worthington clock. The plans for the Worthington clock were scanned into adobe photoshop cs2. I use this program so I can make adjustments to the pattern. When it comes time to cut out a part, I print out the pattern from photoshop. The back of the worthington clock was printed out in 3 peices and then taped together. I set the peices that were already cut out with the pattern.

Tomorrow night I am going to try to get the wood ready to stack cut 2 backs at once.

Sunday, February 22, 2009

More work on the Worthington clocks

Cutting out the upper back of the Worthington clock
Today I continued cutting on the back top of the 'Worthington' clocks. The parts are being stack cut out two at a time. You have to cut a little slower when stack cutting but overall it saves time compared to cutting them out one at a time

Finished Cutting


Here the the cutting is finished and the pattern has to be pealed off of the wood. This is especially hard if the pattern has been applied and then the part sits around for several months before its cut out.

After the pattern is pulled/scraped/etc off of the part, the part is sanded.


Pulling the pattern off of the finished part
An orbital sander with fine paper is used to finish up the part. It doesn't take to much sanding to get the job done. You have to be careful not to sand too much off and get into the next ply.

Sanding the parts with the orbital sander


The finished parts


The two completed tops after sanding. Cutting out the back of the clock is next.

Saturday, February 21, 2009

Guard that eye!

Eye patch so I wont dig my eye out
The right eye is getting better each day. I have to put in eye drops four times a day and also wear a patch at night so I dont scratch and dig at my eye. It's lots of fun.

Friday, February 20, 2009

Word for the day: Aniseikonia

Well its the morning after the eye surgery and my pupil size is back to normal. I decided that I would try out my current distance glasses by removing the lens for the right eye. I put the glasses on keeping both eyes closed. I opened my left eye and focused on an object in the kitchen. I then closed my left eye and opened my right eye. Wow what a difference in size. Now for the test. What will the object look like with both eyes open. I opened my eyes and my brain could not merge the images. The glasses came off as fast as I could get them off my face.

After reading on the Internet several days before the operation I came across the term: Aniseikonia, a problem with vision where images on each of the retinas are different sizes. I think that if I would have kept my glasses on I would have been sick.

The drive up to Orem, Utah for my followup eye appointment was fun. I didn't wear any glasses so I could not see that great out of my left eye. My right eye that was operated on had to do all the work. I was fine until I reached I-15 where there was lots of traffic. I really had to pay attention so I would not get into an accident.

The eye doctor checked my eye and found that it was healing nicely. Vision was 20-20 with a very slight astigmatism. I needed some computer glasses for work Monday so I asked the doc what he could come up with. After a few minutes he had a trial frame with some lenses. I put the glasses on and sat down in front of the computer. So far so good, let me see, why am I seeing double? Aniseikonia!! Well, the only solution besides getting the other eye operated on for cataracts, is a contact lens. I would like to have the other eye operated on but in the mean time I am now wearing a contact. The doctor applied some numbing drops to the left eye, popped in the contact, and wow it seems to be working.

Well I will have to give this contact thing a try. I tried wearing contacts about 5 years ago and couldn't stand it.

Thursday, February 19, 2009

Fun at the Cataract and Lasik Center of Utah!!

Its over! Photo with head surgeon
Well the day finally arrived to get the cataract removed from my right eye. Up to this point in time, everything that I looked at had a ghost image to the right of the object. The ghost was not a problem when looking at items up close, but when the objects were further away I really noticed the problem.

Driving, looking at telephone poles with a snowy winter background was really a problem.

My wife drove me up to the "Cataract and Lasik Center of Utah" for my 9:30 am appointment. We entered the waiting room and I signed in with the receptionist.

A nurse came up to me in the waiting room and said that she had to apply some drops to dilate my eye. I was waiting for the eye drops but she put a small piece of cotton under my eyelid that contained the drops. This was done to make sure that my eye stayed dilated during the entire length of my visit.

As I sit there in the waiting room, a nurse assisted another elderly patient out of the operating room. She asked the patient who brought her here so she could give her instructions for care of the eye because she thought that the patient would not remember them. I thought to myself "Oh crap, I don't want to messed up that bad".

Well eventually I was taken back to a room next to the operating room. Here they gave me some drugs to calm me down. I had to hold the liquid under my tongue for 5 minutes so it could be absorbed into my system. While I was waiting, I decided that I would play a game of solitaire on my iPod touch. As the game progressed I noticed that I was missing some very obvious moves so I guessed that the drugs were working.

The nurse finally escorted me into the operating room. Finally it was my turn and I was going to get this over with. Funny, I didn't seem to mind that they would be poking and cutting my eye at this point. Now I had to complete a test before they would start working on me. What is my name? What is my birthday?, and the most important question... Which eye are they supposed to be working on.

I asked the nurse if I should be as coherent as I was currently and she said "we could give you more drugs if you want them". I opted out for the additional drugs since by this point in time I could care less if they were cutting on my eye.

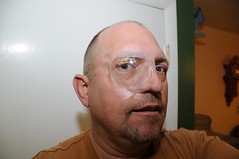
They had me lay down to get ready for the operation. Out came the tape to tape my head in position. I looked up at the light and all I could see was blurry since my eye was dilated. As the operation proceeded all I can remember is the surgeon saying that I would feel some pressure, and each time she said that, the blurry light would move around.

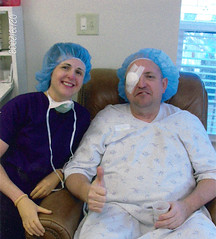
The operation was finished in no time, I guess I was in there about 10 - 15 minutes. After the operation, a photo taking session for advertisements and something to drink since I hadn't had anything for the past 12 hours to eat or drink.

Monday, February 16, 2009

One day to go and I have to get it done

If you have been reading this blog on of the re-occurring theme's of the blog is that I wait to the last minute to get things done. Well it is a day before Brendas birthday and I need to get her present done.


I photocopied the main pattern for the cell phone holder. As I looked at it I noticed that the pattern was not full size. Crap!!! Well, I decided that I would just draw up the pattern by hand. The outline of the cellphone holder was traced onto paper, and the paper was folded in half. I drew half of the pattern and then traced what was drawn onto the other side of the paper.
In this photo, the pattern was transferred onto the leather and the initial cuts were made using the swivel knife. A border was also added to the pattern.


I am hard at work tooling the pattern. Notice how far down my nose my glasses are resting. My glasses are not bifocal but I really need a pair. At this point in time, I have a cataract in my right eye that has image ghosting problems.
This show shows some of the tooling on the main section of the cell phone case. At first I think that the tooling doesn't look all that good, but it seems to get better as the project progresses.

Here is a shot of the cell phone holder after the tooling and assembled. The finish has not been applied at this time.
The case went together really easy with out any problems. The leather was still wet at the time from the tooling. I began to get impatient so I used a hair dryer to dry the leather so I could apply the finish.

Below is a shot of the case with the finish applied. the hair dryer was also used to help dry the finish.
Here is a shot of the case looking at the side. The finish looks good and I think that it will work.


Here is a shot of the completed project. Brenda likes her new cell phone holder.

Sunday, February 8, 2009

More leather work - Brenda's cell phone case

Started working on a leather cell phone case for Brenda's birthday. Here is a photo of the project as I am getting ready to start working on it.


I started tooling the front flap of the cell phone case. After the pattern was transferred I noticed that it was just a bit off center.
A border was added around the flower. The border was not in the original plan but I like to customize it just a bit.


Below the border has been beveled and the background started.

Saturday, February 7, 2009

The 30 Year Leather Handbag project

Sometimes I just don't work on projects for a long time. Just after high school 1978 - 1980 I did some leather work and made a handbag for my girlfriend at the time. My mom saw the handbag and had to have one. The supplies for the handbag were acquired and the project started. Then life happened (Marriage, Children, Job, etc.) and I forgot about the handbag. Yes I know that its a lame excuse but the handbag ended up in the basement lost with all the other junk that's down there.

A couple of weeks ago, I was out visiting my parents and the discussion came up about me and how sometimes I don't finish projects. At that point my mother piped in with a "Where's my handbag???". I was finally shamed into completing the project I began over 30 years ago. I wondered if the parts for the handbag could even be located in the basement. Fifteen to twenty minutes later most of the parts for the handbag were found.

I created a list of the missing items needed to complete the handbag. The additional items needed to complete the handbag were purchased at a Tandy leather store in salt lake city. I wondered if Tandy Leather was even in business. I bought some additional tools and a 12" x 12" x 1 1/2" piece of granite to tool the leather on.

I started tooling the leather and quickly noticed that my eyes were not the same as they were 30 years ago. On came the lights and the thought crossed my mind to get out the lighted magnifying glass I use with the scroll saw. A few days later I was lacing up the handbag and putting the finishing touches on it.

I took the handbag out to my parents house. I had my wife wear the bag over her shoulder when we walked into the house. My mom keep looking at it but didn't say anything. Finally my wife asked my mom how she liked her bag. We finally let her know that it was hers. Later I told my dad that I would make a wallet for him but he would probably not be alive 30 years from now when I get it finished.

Pen turning

On my quest to be a 'Jack of All Trades and a Master of None' I attended a pen turning class at the WoodCraft store in Sandy Utah. I was up that way for an eye appointment to get my cataracts checked for possible surgery. That's another story.

The class started at 6:00 pm and lasted two and a half hours.

The wooden part of the pen is Olive wood. It was turned down to the correct size on a JET mini lathe. The pen is a Wall Street II kit. I was lucky that my eyes had returned to normal because the eye doctor dilated them. It would have been a pain to try to work on it with them dilated.


This shot shows some of the wood grain on the back side of the pen.


Wednesday, February 4, 2009

Finally, this clock is finished


I like to build clocks using patterns from http://www.wildwooddesigns.com/. Included are some photos of a clock that was finally finished this week. The clock was started one and a half years ago for a friend of mine where I work. Once his clock was started, somehow 5 other clocks cut in line in front of his.

This clock is the Worthington hall clock. Its the 4th clock that I have completed using this pattern.
All the fretwork parts of this clock were cut out using a 26" RBI hawk scroll saw. The stain and
finish on the clock was applied using a Graco HVLP sprayer.
In the photo to the right, the trim is being

attached to the face of the clock. Next the clear coats are applied.


Last Saturday 31 Jan, 2009 the weather was nice enough to setup outside to apply the finish to the clock.
This is the completed clock. Scott, my friend from work told me to take as much time as I wanted to complete the clock as long as he received it before he retired.
The clock also has a pendulum that is not installed in the photo on the left.
I really like how the finish turned out on the clock. The clock is constructed using 1/4" Baltic birch 5 ply plywood with an internal pine support structure.
Well, I have two more clocks like this that I have already started cutting out. These will have to be completed before I start on the Lacy Swiss clock. I am thinking about keeping one of the clocks for the front room, and selling the other clock.

I think a lighter finish with dark trim might look good.